Battle of Shizugatake Feature + 17 new castles
This update brings 17 new castle profiles related to the Battle of Shizugatake and an all new feature article illustrating the battle in text, images and maps! See Battle of Shizugatake for more details. It all started with a visit to Genbao Castle and a quick stop at [[Tenjinyama Fort]
Battle of Shizugatake Feature + 17 new castles
2025-07-19
This update brings 17 new castle profiles related to the Battle of Shizugatake and an all new feature article illustrating the battle in text, images and maps! See Battle of Shizugatake for more details.
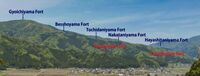
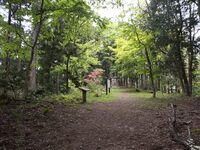
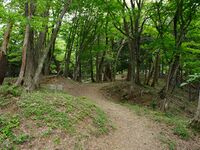
It all started with a visit to Genbao Castle and a quick stop at Tenjinyama Fort on the way home. But the more I absorbed about the events surrounding this battle, the more compelling the story became. Two years and six trips later, I had visited 18 castles in the region — some more than once. I’ve become quite familiar with the route from my home to Lake Yogo, as well as navigating the roads of northern Ōmi!
As I explored the history behind these castles, it became clear that the story was far too rich to tell through individual profiles alone. The pieces had to be woven together into a proper feature article to make sense of the battle as it unfolded across the landscape. Castle books and articles often gloss over history — or worse, simplify it so much to be misleading. On the other hand, most history articles tend to ignore the terrain and fortifications entirely. As a castle fan who enjoys understanding the deeper context and stories behind what I see on the ground, I decided to write the article I wanted to read. I hope you’ll enjoy it too.
This project was also a fun technical challenge. I learned more about using Leaflet maps and created several new styles (CSS classes) and map features to help visualize the campaign that I can re-use again in the future. If you know of other Kansai-based stories that deserve the same treatment, let me know! I have a few in mind already… and hopefully the next one won’t take two years.
Several planned winter visits were canceled due to snow, which delayed things considerably. Interestingly, most of my visits took place in April — the same season in which these castles were originally constructed. If all goes well, I'm going to visit maybe 2 more times this fall to add some ancillary forts and details to this feature.
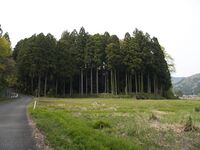
Besshoyama Fort / 別所山砦
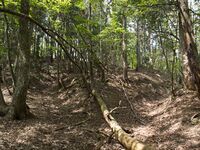
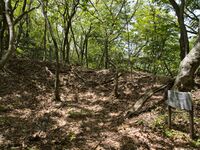
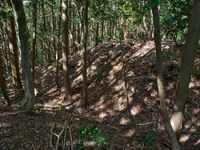
Well before reaching the main fort area, you’ll encounter a massive tatebori trench about 200+ meters down the ridge. It’s not marked on the map, and while it functions as a defensive trench, it also serves as a shortcut down the south slope. This path passes near a largely undocumented site known as Yamaderayama Fort. This trench and fort may have been designed to protect a rapid deployment route to the southern slope. Just beyond this, you’ll also find a yokobori trench along the roadside—yes, there’s actually an abandoned logging road that runs nearly to the top of the mountain. These outer defenses are easy to miss and not well-documented, but they clearly formed an extended perimeter for Besshoyama.
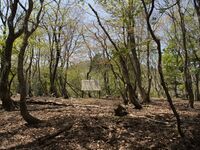
As you continue toward the main bailey, you’ll notice slight embankments and ground shaping that create a switchback entrance to the main fortification. From here, the trail continues with a steep 40-minute climb to Gyoichiyama Fort at the mountain’s summit. Unfortunately, I had to turn back partway up the final stretch due to time constraints (spent too much time exploring other forts along the way) — and a lingering leg injury so I was not at my best nor fastest — but even without reaching the top, Besshoyama offered some of the most complete and layered fortifications along the entire ridge. It was clearly the highlight of the Mt. Gyoichi fortifications.Chausuyama Fort / 茶臼山砦
Dogiyama Fort / 堂木山砦
Gyoichiyama Fort / 行市山砦
Hayashitaniyama Fort / 林谷山砦
Imaichikami Fort / 今市上砦

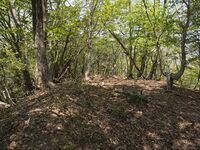
Just beside the Hachiman Shrine is a slightly elevated, flattened area with a grave for the Tohno clan, local landholders. Some say this was the site of their fortified residence, while others suggest the nearby Jurakuji Temple. This same area marks the trailhead for Imaichikami Fort. From here, head straight up the ridge. There is a worn path or trail-like route you can follow partway up. Along the way, there's a spot with what looks like dorui embankment to the left, offering excellent views up the valley. It's also more spacious around here, and I believe it must have been fortified or used as a lookout.
After this point, you’ll need to angle up the ridge to the right. It would be best to follow my Yamap trail or take a good map. There is no clearly defined route.Iwasakiyama Fort / 岩崎山砦
Kashiwadaniyama Fort / 柏谷山砦
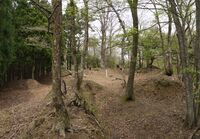
At one point I nearly turned back, but trusted the terrain and eventually reached the ruins. The main bailey is clearly identifiable, as you’ll see in the photos, and the site is a worthwhile visit, if you’re prepared for a bit of off-trail adventuring.
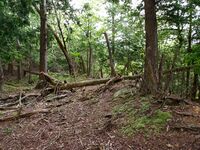
From there, the ridge continues another 300+ meters to Ohtaniyama Fort (大谷山砦). I attempted to push forward, but the path was too choked with fallen bamboo and trees. After advancing only about 15 meters in tough conditions, I decided that climbing back through that mess while going uphill wasn’t worth the risk or effort.
While most of the forts on the Mt. Gyōichi ridge are accessible via a clearly marked and maintained trail, Kashiwadaniyama and Ohtaniyama are best left to experienced hikers or those equipped with GPS and a good sense of direction.Nakataniyama Fort / 中谷山砦
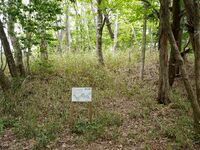
If you go left from the sign, you’ll follow the tatebori (vertical trench) running down the mountainside. If you go straight, odds are you’ll miss the castle entirely. The main structure is tucked off to the left beyond this trench, so use this trench and signpost as your cue to veer off-trail. Keep going until you hit an earthen embankment or another trench.
On paper, I didn’t expect much from this site—just a few oddly angled trenches without a recognizable castle layout. But once you’re there, walking the hillside, the logic of the design starts to come into focus. Like Hayashitaniyama Fort, this was likely a southern-facing fortification, intended to guard against a possible approach by Hideyoshi’s forces up the mountain.
The name of Tochidaniyama Fort and Nakataniyama Fort are flipped in some old materials and even the maps and signposts on the site. I'm using the naming conventions from the Shiga Prefectural Castle Survey, which are followed in most modern books and materials too. Unfortunately, the local signs have not been updated to match!Oiwayama Fort / 大岩山砦
Shinmeiyama Fort / 神明山砦
Shizugatake Fort / 賤ヶ岳砦
Tabeyama Castle / 田部山城
Tagamiyama Castle / 田上山城
Tenjinyama Fort / 天神山砦
Tochidaniyama Fort / 橡谷山砦
From one of the lower baileys, a side ridge leads to Kashiwadaniyama Fort, but there is no trail or signage—not even marked trees to guide the way.
The names of Tochidaniyama Fort and Nakataniyama Fort are flipped in some old materials and even the maps and signposts on the site. I'm using the naming conventions from the Shiga Prefectural Castle Survey, which is followed in most modern books and materials too. Unfortunately, the local signs have not been updated to match!Tohnoyama Fort / 東野山砦
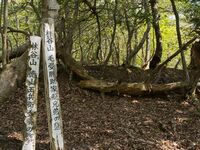
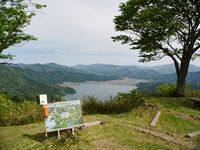
There are four ways into the site. The first is the former (now closed) logging road. It is a bit long and has a barrier, but it can be opened easily. A sign indicates “2.3 km to the castle,” so it appears visitors are still welcome this way. Go through the gate and follow to the right. See the photo below.
The second option is to hike through Shobudani Fort and take the steep ridge up. The main route into Shobudani is also beyond this same barrier, branching left.
The third is a marked trail near the Hachiman Shrine. I did not take this path, but the trailhead is clearly marked by the roadside and may be the most proper route.
The route I took was to start from Imaichikami Fort. I hiked the trail (which is somewhat confusing in parts) from the Hachiman Shrine up to Imaichikami, then continued past it to the ridge where I linked up with the old logging road. I was not sure this route would work. I was guessing from the maps but it turned out well. From there I followed the road mostly downhill to Tohnoyama Fort. After visiting, I descended via Shobudani Fort.
Tohnoyama Fort is often misread as “Higashinoyama,” but the correct reading is “Tohnoyama,” a local dialectal pronunciation of 東野山.Recent News
Sep 28, 2025
Yagyu Castles, Chihaya Akasaka Forts, and Kaibara Jin'ya
Sep 20, 2025
ART added 33 new castles across central Japan
Jul 29, 2025
31 new profiles from ART for Gifu Prefecture
Jul 19, 2025
Battle of Shizugatake Feature + 17 new castles
Jul 8, 2025
34 new profiles from ART for Shizuoka and Yamanashi
Jun 7, 2025
Comment System Upgrade
May 24, 2025
Four new castles around Sasayama Hyogo
May 16, 2025
10 Kyoto Castles Update May 2025
Mar 23, 2025
Hagi Castle & Hagi Castle Town Project
Jan 23, 2025
Bitchu Matsuyama Castle and Ohmatsuyama Castle Updates
Jan 3, 2025
2024 Jcastle cleanup and Happy New Year 2025
Dec 10, 2024
Sayonara Google Maps
Dec 2, 2024
Tsuyama Castle Update and 500th Castle Visited
Nov 11, 2024
Jcastle Rebuild 2024
Oct 3, 2024
11 New Castles around Kyoto
Sep 30, 2024
ART's New Profiles for Aichi Prefecture
Sep 22, 2024
5 new Okinawa Castle Profiles
Jul 27, 2024
Mikazuki Jinya, Kohyama Castle, and updated Hikone Castle
Jul 22, 2024
28 new profiles from ART
Jul 7, 2024
5 Castles from Ayabe City in Kyoto